8x10 Bathroom Floor Plans: Optimizing Space and Functionality
Designing a bathroom, particularly one with the dimensions of 8x10 feet, requires careful planning to maximize space and functionality. This size offers a reasonable footprint to accommodate essential fixtures such as a toilet, sink, shower or tub, and potentially even storage solutions. Successful implementation hinges on understanding various layout options, code requirements, and design principles that contribute to a comfortable and efficient bathroom.
An 8x10 bathroom translates to 80 square feet, providing sufficient area to work with, but strategic allocation of space is paramount. This article explores common 8x10 bathroom floor plan configurations, focusing on optimizing fixture placement, enhancing accessibility, and incorporating storage, all while adhering to building codes.
Understanding Common 8x10 Bathroom Floor Plan Configurations
Several floor plan configurations frequently appear in 8x10 bathrooms. These layouts are often dictated by the location of plumbing connections, the placement of windows and doors, and the desired flow of traffic. Understanding these common layouts provides a foundation for customizing a bathroom design to specific needs and preferences.
The Linear Layout: This configuration positions all the fixtures along one wall. This is a practical solution when plumbing is concentrated on a single wall. The toilet, sink, and shower or tub are placed in a row. This layout can feel somewhat cramped if not carefully planned. Prioritizing narrow fixtures and wall-mounted vanities can help maximize floor space in this configuration.
The L-Shaped Layout: The L-shaped layout places the toilet and sink on one wall and the shower or tub on an adjacent wall. This layout creates a more defined separation of functions and can enhance the feeling of spaciousness. The corner shower is a popular choice for this configuration, as it effectively utilizes the corner space, maximizing walking area.
The U-Shaped Layout: A U-shaped layout typically positions the sink on one wall, the toilet on a perpendicular wall, and the shower or tub on the third wall. This layout creates a more defined zone for each function, offering privacy and a sense of enclosure. However, this configuration requires careful planning to ensure adequate clearance between fixtures and avoid a cramped feeling. A centrally located window can significantly enhance the open and airy feel of this layout.
The Split Bathroom Layout: A split bathroom divides the wet zone (shower/tub and toilet) from the vanity area. This configuration is useful for shared bathrooms, allowing for simultaneous use of the sink and toilet/shower. A partial wall or partition can further enhance privacy between the two zones.
Optimizing Fixture Placement for Accessibility and Flow
The placement of bathroom fixtures significantly impacts the overall functionality and user experience. Prioritizing accessibility and ensuring a smooth flow of traffic are crucial considerations. Building codes mandate specific clearances around each fixture to ensure safe and comfortable use.
Toilet Placement: Building codes typically require a minimum of 15 inches from the center of the toilet to any adjacent wall or fixture. Ideally, a clearance of 30 inches in front of the toilet is recommended for comfortable use and accessibility. Concealing the toilet behind a partial wall or incorporating a water closet can enhance privacy.
Sink and Vanity Placement: The optimal height for a bathroom vanity is typically between 30 and 36 inches. A larger vanity offers ample counter space and storage but can encroach on floor space. Wall-mounted vanities create the illusion of more space and allow for easier cleaning underneath. Ensure at least 30 inches of clearance in front of the sink for comfortable use.
Shower and Tub Placement: Showers and tubs occupy a significant portion of the bathroom footprint. A standard bathtub is approximately 60 inches long and 30 inches wide. A walk-in shower can be customized to fit the available space; however, a minimum size of 36x36 inches is generally recommended. Corner showers are effective space-saving solutions, especially in L-shaped layouts. Glass shower enclosures create an open and airy feel while containing water spray.
Door Swing Considerations: The swing of the bathroom door can significantly impact the available space. An out-swinging door maximizes interior space but may not be feasible in all situations. A pocket door, which slides into the wall, is an excellent space-saving alternative, particularly in smaller bathrooms. Consider the direction of the door swing in relation to the placement of the toilet and sink to prevent collisions and ensure comfortable access.
Window Placement: Windows provide natural light and ventilation, enhancing the overall ambiance of the bathroom. Positioning windows strategically is important to maximize these benefits while ensuring privacy. Transom windows, located high on the wall, offer light and ventilation without compromising privacy. Frosted glass or window coverings can also enhance privacy.
Incorporating Storage Solutions in an 8x10 Bathroom
Adequate storage is crucial in any bathroom, especially in a smaller space like an 8x10 bathroom. Effective storage solutions help to keep the bathroom organized and clutter-free. Maximizing vertical space and utilizing creative storage options is key.
Vanity Storage: Vanities offer valuable storage space for toiletries, towels, and other bathroom essentials. Opt for vanities with drawers and shelves to maximize organization. Consider including pull-out organizers for added convenience. Recessed medicine cabinets provide additional storage without encroaching on floor space.
Wall-Mounted Shelving: Floating shelves provide stylish and functional storage for towels, decorative items, and toiletries. Position shelves above the toilet or next to the shower to maximize unused wall space. Open shelving can create a more open and airy feel than enclosed cabinets.
Over-the-Toilet Storage: Over-the-toilet storage units utilize the space above the toilet, providing additional shelving for towels, toiletries, and decorative items. These units are available in various styles and sizes to suit different bathroom aesthetics.
Shower Niches: Incorporating recessed niches into the shower wall provides convenient storage for shampoo, conditioner, and soap. Niches eliminate the need for bulky shower caddies and create a clean and streamlined look. Ensure that the niches are properly waterproofed to prevent water damage.
Towel Bars and Hooks: Strategically placed towel bars and hooks provide convenient drying and storage for towels. Consider installing multiple towel bars to accommodate multiple users. Hooks are useful for hanging robes and washcloths. Heated towel racks provide the added benefit of warm towels.
Adhering to Building Codes and Regulations
Bathroom renovations must comply with local building codes and regulations. These codes ensure the safety and accessibility of the bathroom. Failure to comply with building codes can result in fines and delays in the renovation process.
Plumbing Codes: Plumbing codes regulate the installation of water supply and drainage systems. These codes specify the types of pipes and fittings that are permitted, as well as the minimum pipe sizes and slopes. Proper venting is essential to prevent sewer gases from entering the bathroom.
Electrical Codes: Electrical codes regulate the installation of electrical wiring, outlets, and fixtures in the bathroom. Ground fault circuit interrupters (GFCIs) are required for all outlets located near water sources to prevent electrical shock. Ensure that all electrical fixtures are properly grounded and waterproofed.
Ventilation Codes: Ventilation codes require bathrooms to have adequate ventilation to remove moisture and prevent mold growth. A bathroom exhaust fan is typically required to be vented to the exterior of the building. The fan should have a sufficient airflow capacity to effectively remove moisture from the bathroom. Check local codes for specific ventilation requirements.
Accessibility Codes: Accessibility codes, such as the Americans with Disabilities Act (ADA), specify requirements for accessible bathrooms. These requirements include minimum clearances around fixtures, grab bars for toilets and showers, and accessible sinks and toilets. Adhering to accessibility codes ensures that the bathroom is usable by people with disabilities.
Permits: Most bathroom renovations require a building permit from the local building department. Obtaining a permit ensures that the renovation complies with all applicable building codes and regulations. Failure to obtain a permit can result in fines and delays. Contact the local building department to determine the specific permit requirements for the bathroom renovation.
Designing an 8x10 bathroom requires careful consideration of layout, fixture placement, storage solutions, and building codes. By understanding these key elements, one can create a functional and aesthetically pleasing bathroom that meets individual needs and preferences. Prioritizing space optimization and accessibility will contribute to a comfortable and efficient bathroom experience.

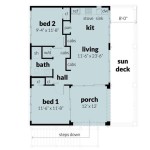
8x10 Bathroom Layout

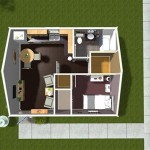
Here Are Some Free Bathroom Floor Plans To Give You Ideas

Pin Page

8x10 Bathroom Layout Ideas Inc Walk In Shower Corner And Tub Options

Small Bathroom Floor Plans Remodeling Your Ideas

8x10 Bathroom Layout

Bathroom Layouts

Large Rectangular Bathroom Layouts And Floor Plan Ideas

8 Simple Bathroom Design Tips

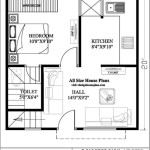
Washroom Design 8 5 X 10 Feet Bathroom